Raspberry Pi camera stream with control dashboard
I made my Raspberry Pi into a controllable security camera so I can stalk my cat from work. Here is how I did it.
Pre-requisites
- Raspberry Pi 3 B
- Micro SD card (8GB or larger) with raspbian installed
- Raspberry Pi camera module
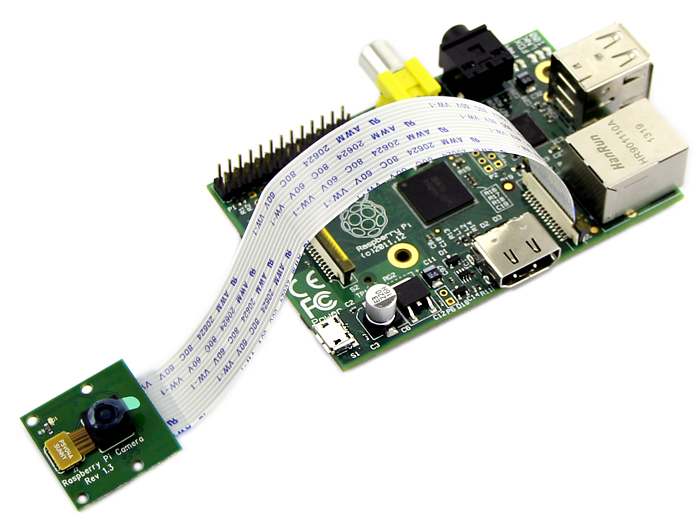
Hooking up the camera module and enabling it
The camera is connected to the Raspberry by inserting the Flex cable into the slot situated between the HDMI port and the Ethernet port.
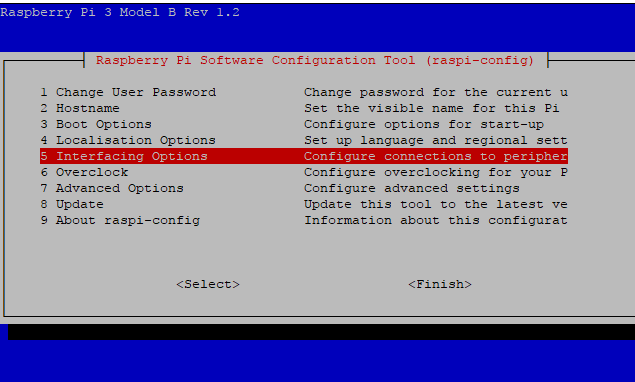
Once the camera in inserted it must be enabled. Type
sudo raspi-config
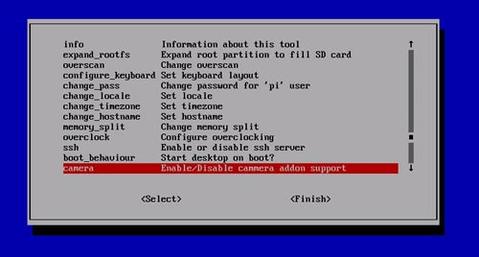
and go to Interfacing Options and enable the camera module.
Once the camera has been plugged in and enabled you can test it by taking a still picture
raspistill -o image.jpg
Video stream using mjpg-streamer
I used mjpeg-streamer to run a lightweight webcam stream hosted on a website. It works well because it has explicit support for the Raspberry Pi camera module. First, install the dependencies:
sudo apt-get update
sudo apt-get install git cmake libjpeg8-dev
Then, clone the repository
git clone https://github.com/jacksonliam/mjpg-streamer.git
and build the code
cd mjpg-streamer-experimental
mkdir _build
cd _build
cmake ..
make
sudo make install
Move the compiled .so-files to an appropriate system directory:
cd ..
sudo cp output_http.so /usr/local/lib/.
sudo cp input_raspicam.so /usr/local/lib/.
Make a folder for the website and move the sample live stream html file there :
sudo mkdir /var/www
sudo cp ./www/stream_simple.html /var/www/index.html
We are now ready to run the live stream. The following command will stream the input from the Raspberry Pi camera to a web server listening to the port 8080:
mjpg_streamer -o "/usr/local/lib/output_http.so -w /var/www" -i "/usr/local/lib/input_raspicam.so"
The red light on the camera module should now light up. On the same network as the Raspberry, the stream can now be found by opening a browser and going to http://<raspberry ip>:8080
Making it into a service
By making the live stream into a system service, we can make it turn on automatically on reboot (or after power outage) and more easily control turning it on and off. Create a new file called /etc/systemd/system/livestream.service with the following content:
[Unit]
Description=Webcam service
After=multi-user.target network.target network-online.target

[Service]
Type=idle
ExecStart=/usr/local/bin/mjpg_streamer -o "/usr/local/lib/output_http.so -w /var/www -c <username>:<password>" -i "/usr/local/lib/input_raspicam.so"

[Install]
WantedBy=multi-user.target
Remember to replace <username> and <password> in the line starting with ExecStart above. This will be the credentials used to access the livestream.
To run the live stream automatically on boot, we enable the service:
sudo chmod 664 /etc/systemd/system/livestream.service
sudo systemctl enable livestream.service
Accessing the stream from outside the local network
To be able to view the live stream from outside your local network, go into your router’s Port Forwarding settings and forward any outgoing requests for port 8080 to the internal port 8080 on the Raspberry Pi’s local IP address.
Turning the camera on at specific times
The set up so far will make the camera stream stay on for as long as the Raspberry Pi is on. For extra security and privacy, it might be useful to only run the camera stream when you are at work or out of the house. One simple way to make this happen is to make a cron job. Edit the system crontab of the Raspberry:
sudo crontab -e
Then, write the following:
30 9 * * 1-5 systemctl start livestream
30 16 * * 1-5 systemctl stop livestream
This will make the livestream turn itself on every weekday (1-5) at 9:30 am and turn itself off every weekday at 4:30 pm. Change the example above as appropriate.
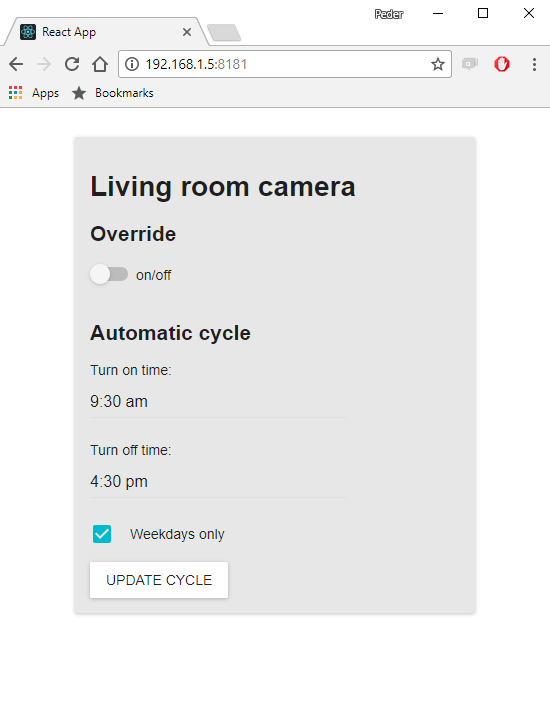
Control dashboard
In addition to the steps above I also set up a dashboard so I can more easily control the camera from any computer or phone connected to my local network at home. This was a little bit more involved and might be the topic of a future post.